

The way of the orc is fraught with peril, but also with great potential. Leaving the Valley of Trials will be your first big step toward fulfilling that potential and becoming a true hero to your kind.
As in our previous guide, we’ll be walking you through levels 5 through 10 of the Orc starting experience as the Hunter class—but a lot of this information will be relevant no matter which class you choose. Let’s get going!
Sen’jin Village
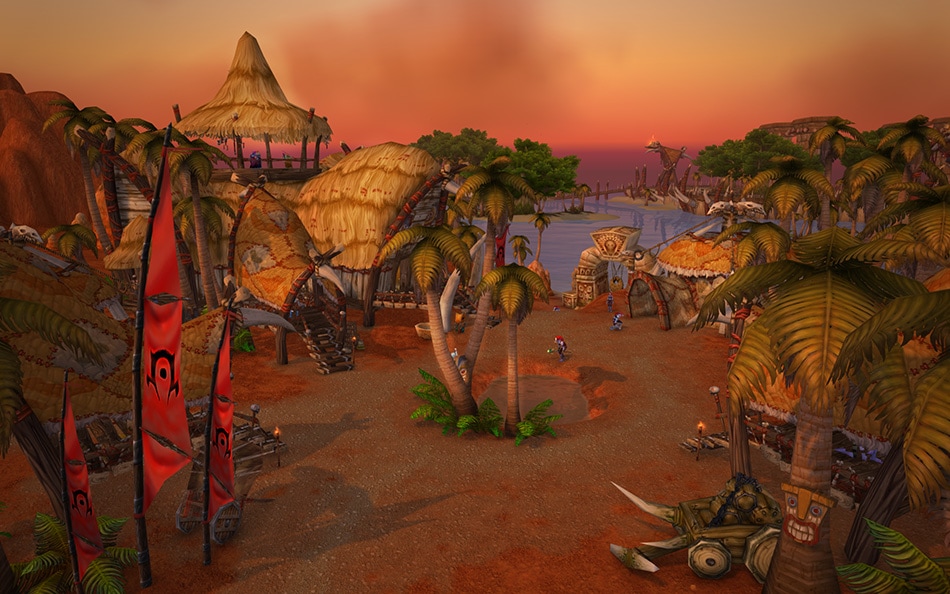
You’ve been tasked with traveling to the nearby Sen’jin Village to let them know of the Burning Blade’s threat. This is where you’ll come face to face with the Troll race and take your next steps as a member of the Horde. It’s not that far down the road to the east though once you leave the Valley of Trials, you’ll begin to encounter more hostile (red) creatures that will attack on sight. It’s a good idea to stick to the road so you avoid getting into any fights you aren’t ready for. A sign at the end of the road will point the way to the village to the right. Going to the left will take you to Razor Hill but we’ll get to that relatively soon.
Sen’jin village isn’t difficult to find and definitely exudes the style of the race that inhabits it.
What’s Here:
- Class Trainers - They’ll provide some guidance and additional information as you advance.
- Riding Trainer and Troll Mount Vendor- Trolls have their own faction specific mounts (the raptor) that you can buy once you have the reputation with their race high enough. You’ll also be able to learn the riding skill once you reach level 20.
- Profession Trainers - You’ll be able to pick up a Profession or two and start your apprenticeship.
- Vendors - Don’t forget to sell off any items you don’t need or want anymore. When in doubt, most items with gray text can go.
- Flight Master - You’ll be able to quickly travel around Azeroth (for a small fee) as you discover new flight paths.
Master Gadrin will be waiting for you in the center of the village. He’s happy you’re there as they have other issues to deal with than the Burning Blade. Humans are causing issues nearby and he’d like your help in destroying their supplies and thinning their ranks a bit.
Before you leave to start picking off the threat the humans pose, make sure you pick up any other quests that are here. A Witch Doctor in Training would like you to pick up some crab goop (mmmmm sounds tasty) for some mojo he’s working on. It’s a simple kill and collect quest that you can do along the shore as you head to put a hitch in the human supply chain further down the shoreline. The crabs are neutral and won’t attack until attacked, but beware the nearby Clattering Scorpids. They will attack if you get too close.
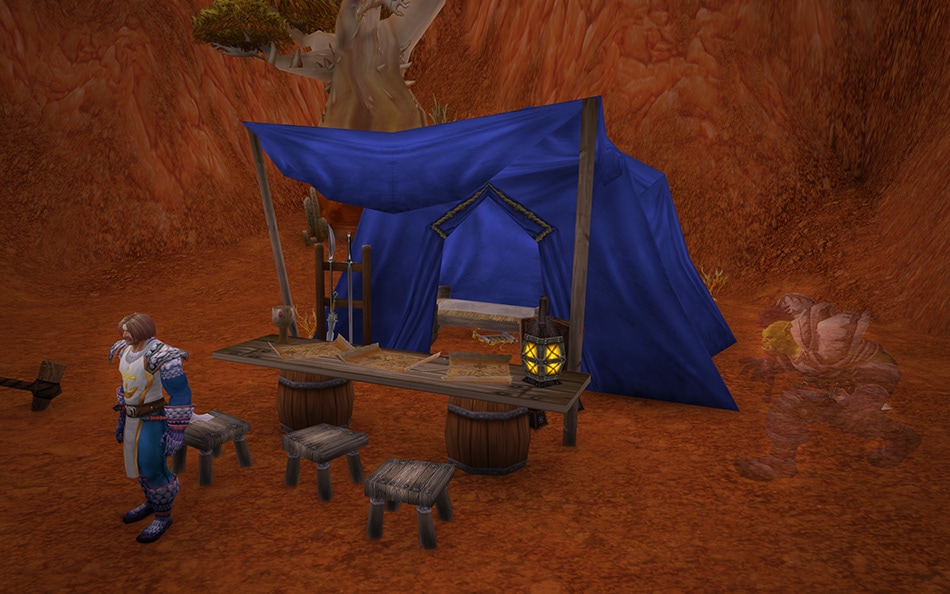
You can’t miss the area that the humans have set up in. They’ve boldly placed their banners right on the shore line near their tents. You’ll need to target the supply crates to destroy them and then picking off the Northwatch Lugs will come easily after that. Don’t panic if more than one comes at you. Managing multiple foes is a skill you’ll need to learn as you move up through the levels and these guys are easy enough to defeat.
Once you’ve collected your crab goop and finished your task with the humans, you’ll need to head back to the village to turn in your quests and pick up new ones.
Master Gadrin wants you go further into the valley to the west to slay more humans. You’ll need to defeat 12 Northwatch troops. You’ll want to pick up the quest Lar Prowltusk has for you as well. Since you’ll be going to the Northwatch Foothold anyway, he wants you to find and destroy 3 sets of Attack Plans there and put a wrench in the human’s plans to attack the trolls.
Bom’bay is happy with his goop, but now needs you to take on something a bit more dangerous by collecting poison from the Scorpids. For this quest you’ll need to damage the scorpids a bit first then “use” (left-click) the Poison Extraction Totem on them to collect it. You can collect on your way to the Northwatch Foothold area or on your way back from it. They’re able to be found in a couple of relatively large areas so you may just need to range out a little bit to find some that others haven’t already killed ahead of you.
When it’s time to put down the totem, a message will show up on your screen, “Clattering Scorpid is casting Envenom! Place your totem down now!” That will be your cue to use your totem to gather the poison you need to complete the quest. Be careful not to kill the Scorpid before you get the totem down or you’ll end up killing more of them than you might have needed to. Keep in mind you’ll also need to watch the 15 second cooldown (time it takes for your totem to refresh) so you can use it again on the next creature.
The locations of the plans you’ll want to burn (right-click on them) in the Northwatch Foothold area are marked on the mini map so should be easy to find. You’ll just need to kill your way to them which fits right in with your plan to kill the humans there anyway.
Like with the Scorpids, the Northwatch troops will attack you as soon as you come near them. Plan your path wisely and don’t bite off more than you can chew. If all else fails, you can always run away to fight another day. If you don’t see the plans right away, don’t panic. Just explore each area thoroughly and mouse-over the various objects in the area that’s indicated on the map. A small gold cog will show up on the item you need to destroy. Sometimes other players will have gotten to it first, but don’t worry, it will respawn relatively quickly. You just have to wait a little bit and it will show up.
Courtesy Tip: Try to be courteous to other players who may be after the same things you are. Leap frogging (going past someone) when they are clearly fighting their way to an objective can be considered rude. Kill stealing (killing a monster (also known as a mob) can also be considered rude. It’s better to ask for a group when possible than to fight over the same spawn. It will make completing quests go faster and you’ll make more potential allies as you progress through levels.
When you’ve completed all three of these quests, you can head back to the village to turn them in. You’ll be rewarded with reputation with both Orgrimmar and the Darkspear Trolls, a new bow, and some items. If there aren’t any items you’d want to equip, (remember Hunters use Leather) then choose the item you can sell for the most money. You can see how much an item will sell for by hovering your mouse pointer over it.
Master Gadrin has another quest for you that will lead you to your next destination in Razor Hill. You’ll need to speak with Jhash who will give you a ride on one of his wolves. He’s right near the entrance to the village waiting for you. You’ll need to right-click on him to speak with him then select the “Can I catch a ride to Razor Hill?” dialogue option.
Razor Hill
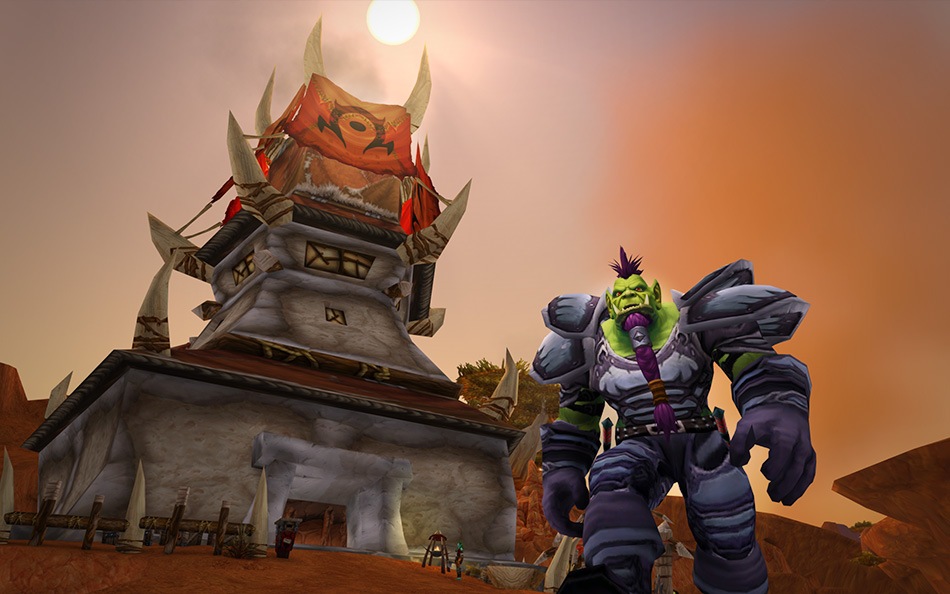
Razor Hill is centrally located within Durotar between Sen’jin Village and the Horde capital city of Orgrimmar.
What’s Here:
- Inn- You can bind your Hearthstone here and use it to return to the inn when you use it.
- Class Trainers - They’ll provide some guidance and additional information as you advance.
- Profession Trainers - You’ll be able to pick up a Profession or two and start your apprenticeship.
- Vendors - Don’t forget to sell off any items you don’t need or want anymore. When in doubt, most items with gray text can go and often have a small gold coin indicating it can be safely sold off for money.
- Flight Master - You’ll be able to quickly travel around Azeroth (for a small fee) as you discover new flight paths.
Upon arriving in town, you’ll notice there are new quests available to you. You’ll want to head into the Inn first to speak with Innkeeper Grosk. You can now make the inn your home by clicking the option “Make this inn your home.” By doing this, you’ll bind the Hearthstone in your backpack to this location, and be able to use it to travel back to the inn. Your Hearthstone has a 30-minute cooldown (meaning you can only use it once every 30 minutes), but it’s very handy when you just don’t want to walk all the way back to the inn from a long hard day of slaying monsters (or skinning animals).
You’ll want to get in the habit of returning to an inn each time you’re ready to log out of the game. When you log out at an inn (or at any designated “rest” area) after playing, you’ll also start accruing Rested experience. Rested experience will provide a bonus to your regular experience (200% of normal experience gained) when you kill monsters. Your experience bar will be blue while you are getting bonus experience and will revert back to purple when you’re only able to earn normal experience.
Resting Tip: A good way to tell if you’re in an area in which you’re earning Rested experience is to look at your character frame in the upper left corner of your screen. You’ll see a small text bubble that says “zzz,” and the name plate and character image will have a soft golden glow pulsing around it. Major cities also serve as areas in which you can gain Rested experience.
Take a moment to check the gear in your backpack against what you’re wearing. Do you have all of the latest and greatest equipped? Once you’ve equipped any new items, it’s time to start gathering quests. To find quest givers, take a look at your map for yellow exclamation points. A slightly faded out exclamation point means that the quest giver is within a building. Once you’re close (or in the building), it will show up on your mini map as a brighter yellow. Silver exclamation points mean that the quest isn’t available until you get to a higher level or complete other objectives first. Before you head out on your quests, it’s worth taking a moment or two to sell any items you no longer want (we hope you’ve been picking up anything you can to sell for money)—that way you’ll have enough room in your bags for more quest rewards or loot.
Ration Tip: You can eat and drink at the same time. At lower levels, eating and drinking isn’t as important since you rejuvenate health (and mana, if you have it) quickly. As you get stronger, however, you’ll want to sit down and have a little something to eat and/or drink to regain health or mana more quickly between fights. Since Hunters don’t need mana, you only need to keep food on you. If you decide to play a character that uses mana, it’s worth noting that you can eat and drink at the same time and don’t need to wait for one to complete before doing another. Just make sure that when you do sit down to eat that you do so away from any monsters that might aggro (attack) you. No one likes to have their meal interrupted.
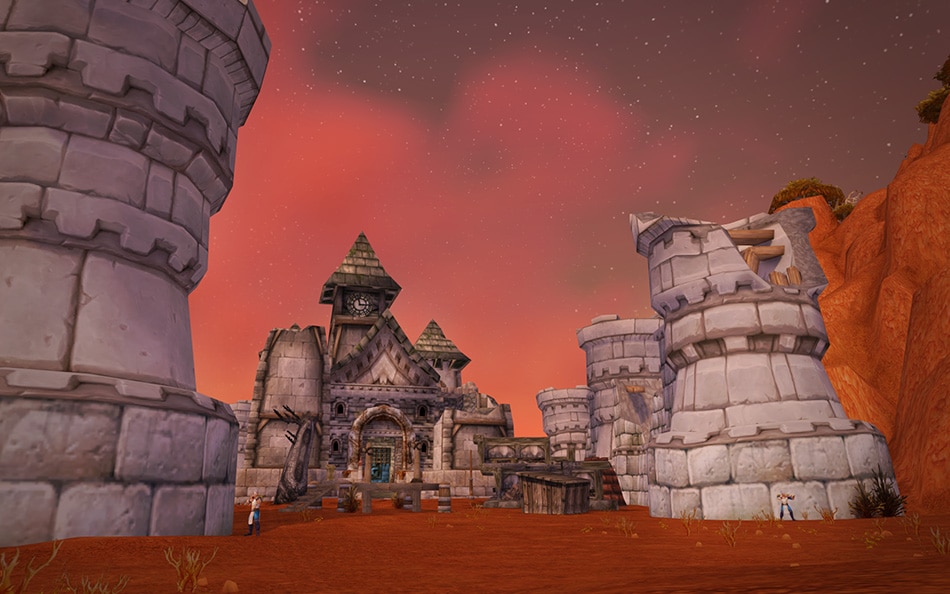
Gar’Thok is waiting for you inside a small bunker. He doesn’t want to send any help to Sen’jin Village and lets you know he has his own human problems to deal with. He wants you to go to Tiragarde Keep to the southeast to deal with some of the humans there. Take notice of the amounts of each type of human he wants you to take out. You’ll need to make sure you’re killing 6 Marines, Sharpshooters, and a named NPC in order to complete the quest.
Gail Nozzywig also has a task for you near Tiragarde. She wants you to collect a few abandoned Kul Tiras knicknacks. You can get back to these quests after you do a little favor for the Butcher though.
Butcher Grimtak wants to send some meat to a friend named Gryshka (it has to be love) and will tell you to go to the orc capital city of Orgrimmar. It’s worth a quick wyvern ride to help him out. Once you’ve accepted the quest, right click the Flight Master and turn in the first part of the quest to him. You’ll then receive a quest to pay a small fee to take a flight to Orgrimmar. Speaking to him again to take the flight will open up a flight map. You’ll want to select Orgrimmar as your destination. It’s just to the north of your current location and will indicate which it is when you put your mouse pointer over it (Orgrimmar, Durotar).
When you reach Orgrimmar, you’ll notice other quests indicated on the map. It’s probably a good idea to hold off on doing these until you’ve completed things in Razor Hill. You’ll need to find your way to the front of the Valley of Strength to complete your quest. To do this, you’ll need to take the nearby elevator down to the bottom floor. It’ll be just behind where the wyverns and Flight Master are. You’ll want to watch your step and wait for the platform to reach you before stepping on.
Gryshka will be very pleased with the delivery and will give you a letter of thanks to take back to Grimtak back in Razor Hill. But first, you’ll need to speak with Doras the wind rider master of Orgrimmar about getting a lift back. Just head back up the path to the elevator to finish this quest. You’ll notice that while you’re in the city, you will be gaining rested experience.
Once you’re back in Razor Hill, turn in the quest Grimtak who now plans to invite you to his wedding later.
With that complete, it’s time to move on to Tiragarde Keep just a little to the south of Razor Hill. You’ll find your targets both outside the keep and also inside the keep where you’ll also find Lieutenant Palliter. Working your way to him should get you many of the targets you need to kill. You’ll also find the Kul Tiras Treasure chests tucked in among the many passages and buildings. They’ll have a soft golden glow around them and are easily identifiable.
You’ll notice that when you kill the humans that they often have linen cloth on them. This resource can be used for the Tailoring profession or First Aid, so you might want to hang on to them.
Back in Razor Hill you’ll turn in your quest to Gail Nozzywig and Gar’Thok and pick up their next tasks for you.
Foaming Sea Elementals are wreaking havoc on the nearby coast and since you’ll be there anyway, Gail is looking for your help in getting a hold of some gnomish tools. You’ll notice you’ve started earning reputation with a new faction, the goblin affiliated Bilgewater Cartel.
It’s time to head back to the coast and get to work on your newest tasks. You’ll notice that there are many injured orcs on the shore as well. Right-clicking on one will start a new quest in which you’ll need to rescue 4 of them from the beach. Each one you rescue will follow along lending a helping hand for a short time.
Ding! Level 8: It won’t be long and you’ll reach level 8 which will give you the Concussive Shot ability. Using this as an opener will slow down your target by 50% for 6 seconds thus keeping them at range for a bit longer so you can do damage to them before they get within melee range.
After making short work of the elementals, saving a few orcs, and collecting some tools, you’ll head back to Razor Hill to turn in and get your rewards and pick up your next tasks. You’ll notice that the previously silver exclamation point has now turned yellow. You’ll be able to speak with Orgnil Soulscar to find out what task he’s had on his mind for you. He has a task that’s a bit further afield in Dustwind Cave. Rather than head there right away, you’ll want to check in to the guard tower first. The tower is just outside of the gates and to the right heading west out of Razor Hill.
At the top of the tower, Thonk will ask you to use a spyglass while there to scout out some flooded areas for survivors of the Cataclysm. Left-clicking on the spyglass will zoom in on your first target. You’ll need to use the spyglass to find Raggarin, the flooded hut, Misha, and Zen’Taji. Once you’ve completed this, Thonk will task you with heading out to several locations to lend your aid. We hope you have your waders on, because you’re bound to get a bit wet out in the Southfury Watershed. Nearly everything here is going to want to take a bite out of you, so make sure you stay wary of getting too close to the wildlife unless you’re ready for a fight.
Raggaran will be waiting with a quest for you once you find him. He needs your help getting rid of some Razormane Quillboars that are nearby.
Tip- Kiting: Hunters are one of the classes that excel at “kiting” creatures. This means keeping their target at a distance while they do damage to them. You’ll find over time that you’ll gain new abilities that will let you combine them to slow your target while letting you move quickly away to keep them at a safe distance.
After taking out the first group of Quillboars, he’ll want you to clean up a few more just a bit further west from where he is. With just a bit of running and a few more kills under your belt, you’ll be able to turn in your quest and move on to meeting up with Zen’Taji near the bridge that leads into the Northern Barrens. It’s right along the western coast of Durotar.
He needs your help in scaring some Plainstriders back to where they belong. You can find them along the coastline nearby. Simply attack them until they flee. He’ll have one more task for you once you’ve finished. He wants you to take care of Screamlash who has proven to be a very deadly yet wasteful creature who is killing small animals but leaving them to rot versus eating them. You’ll need to travel a bit north and keep an eye out for him. He’ll take the same path so if you wait long enough you’re bound to come across him. He’ll show up as a gold emblem on your mini map.
Heading back north you’ll move on to help Misha at the Tor’kren Farm. He wants something to memorialize the loss of his son, and thinks that crocolisk teeth are just the thing to make a necklace with. Don’t be intimidated by the amount of teeth you need to collect—crocolisks have plenty as you’ll learn. Just head a bit south from the farm and you’ll be in prime territory to gather the teeth you need.
Tip-Under Water Breathing: When water is deep enough, your character will automatically begin swimming. Looking down while moving forward will help you go underneath the water. You’ll notice that you will have a Breath bar whenever you go under water. You can stay under for a long time before you need to come back up to replenish it. Pushing the Spacebar will help get you moving in the right direction. If you wait too long though, you can die from drowning.
After turning in the quest, you’ll be very close to level 10 if you haven’t already reached it yet. You’ll also be close to the Dustwind Cave. You can choose to head back to the tower to turn in the Watershed Patrol quest or you can go confront the Burning Blade to gather the Spellscrolls to complete that quest first.
Heading north along upper level of the ridge, you’ll see Dustwind Cave not far from Razor Hill. There will be several of the Burning Blade right outside the cave as if they’re a welcoming party. Getting the six scrolls you need will be fairly easy though there may be some interesting side effects to being exposed to the Fel of the Burning Blade Cultists. We’re pretty sure they’re temporary. You’ll be fine… really.
A quick jog later, you’re back in Razor Hill to turn in your quest and move on up to the Dranosh’ar Blockade just outside of Orgrimmar to begin the next part of your adventure.
So You’re Level 10
You’ll likely reach level 10 prior to completing all of the quests in Razor Hill, which opens up a new opportunity to customize your character—along with some other new opportunities for adventure. You’ll also gain access to a new pet bar which will allow you to control the actions of your pet. Many Hunters leave their pet on Defensive (will attack anything that attacks you) when out in the world and Passive (won’t attack until ordered to) or Assist (will attack your target) when engaged in dungeons so that they don’t accidentally attack the wrong creature.
At level 10, the option to pick a Class Specialization will open up. A new pop-up notification will highlight the new Specialization & Talents pane (N) and will provide additional information on the what choices are available to you. There are three Specializations that will open up for Hunters: Beast Mastery, Marksmanship, and Survival. Take some time to read over the information carefully before choosing. No matter what, you’ll definitely want to choose one before moving on. Once you do, you can check out the new abilities available to you (both passive and active) by opening the Spellbook & Abilities tab (P).
At level 10, you’ll also be able to join Battlegrounds to take part in player-vs.-player (PvP) competition—so if you’re up for testing what you’ve learned against other players in combat, here’s your chance!
To see all of the available quests in Durotar, visit Wowhead’s handy database here. For information on other class Specializations, visit here.
You’re off to a great start toward claiming your spot in Azeroth history, so we’ll bid you farewell until next time. Good hunting! Visit the New Player forum to connect with other new players and our helpful veterans.